Many years ago I made up a little tool which has proved invaluable when attaching an “A” type Laycock-De Normanville overdrive unit to a gearbox.
For those not familiar with this operation a little explanation will help. If you have “been there, done that” skip this part down to the picture with the tape measure in it.
The rear shaft of the gearbox mated to these overdrive units has to be aligned with three individual splines while compressing an oil pump spring and 8 clutch springs as the two units are joined together.
One of the splines is located on the inside of the oil pump cam.
The other 2 sets of splines are away down in the middle of the overdrive unit, one in the clutch sliding member and the other in the unidirectional clutch.

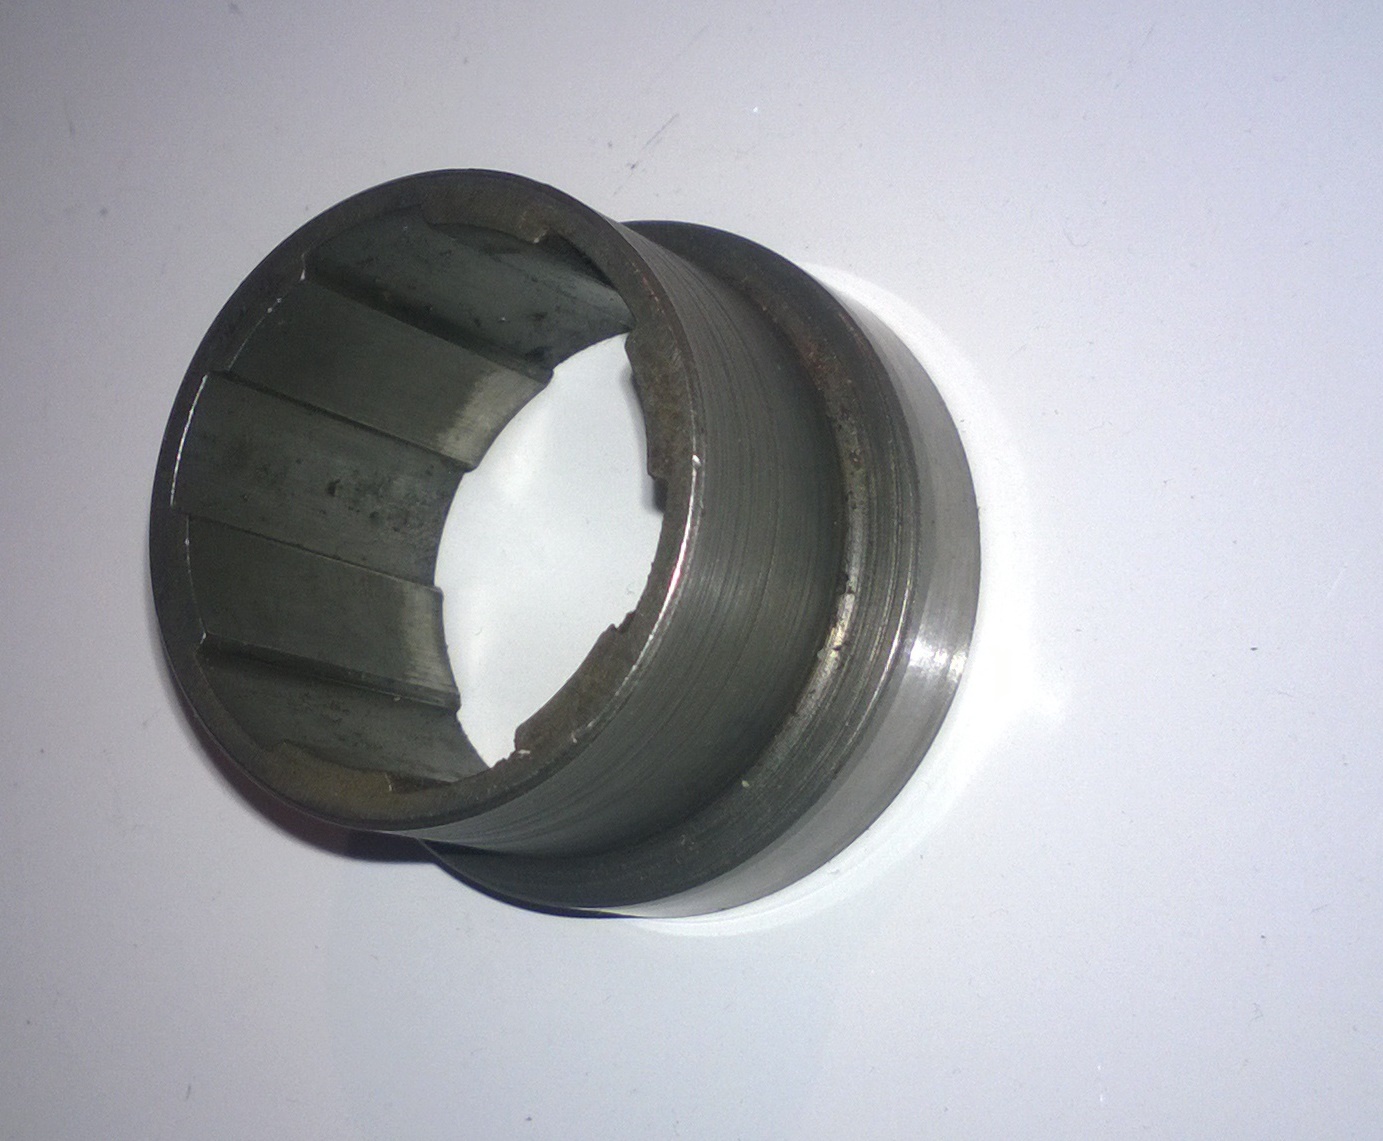
As can be seen in the above picture when the pump cam is positioned on the pump plunger roller the plunger spring holds the cam out of alignment with the rest of the bore of the unit.
Conversely when the cam is fitted on the partially installed gearbox shaft the pump plunger roller protrudes below the cam and will not allow the cam to slip by into its correct position against the overdrive centre bushing.

The factory workshop manual for the Austin Healey 100 illustrates the “recommended” method of installing the overdrive. They suggest “placing the oil pump cam in position on top of the center bushing (as in the photo above) then carefully threading the mainshaft through the oil pump cam and into the center bushing.”

What they don’t mention is that the gearbox weighs in at some 25 kg so holding it with one hand as illustrated while attempting to align the various components with the other is just a little difficult.
They also add as a NOTE: ”the gearbox mainshaft should enter the overdrive easily provided that the lining up procedure previously described is carried out and the unit is not disturbed.”
Well, if I know of one sure way to become “disturbed”, it is to try to mate the gearbox to the overdrive the way that they describe!
This is where the little tool mentioned above can help you maintain your sanity.

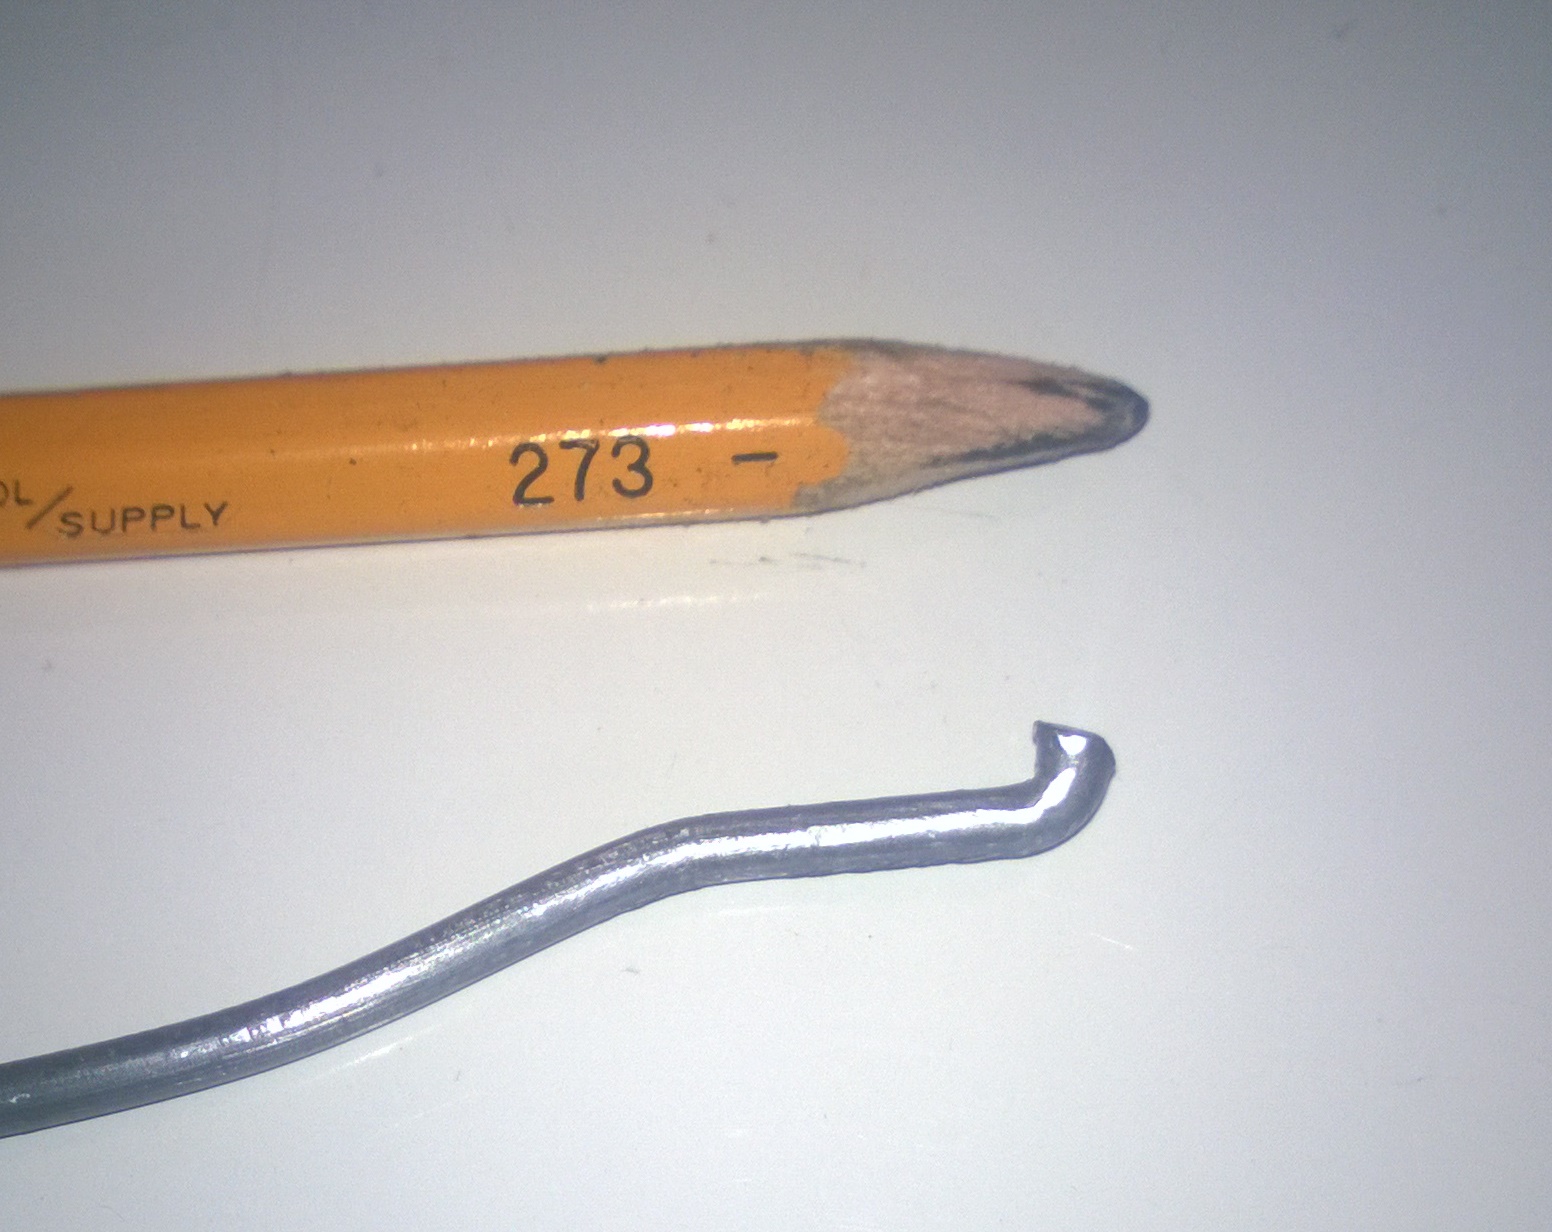
This very inexpensive “Special Tool” is made from a piece of coat hanger wire. After you find out how well it works you may want to get it chrome of even gold plated!
So…How does it work?
In the filter cavity of the overdrive unit there is a conveniently located hole.
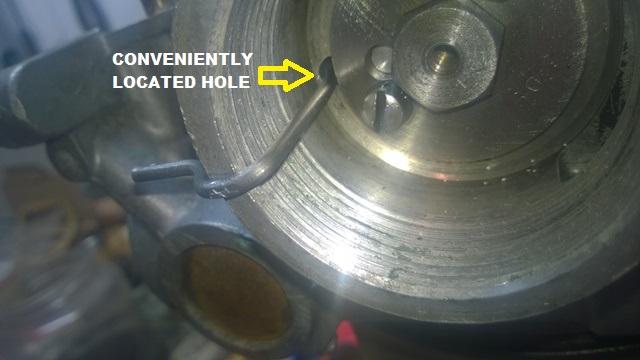
The “Special Tool” is inserted through this hole and up the side of the pump plunger.
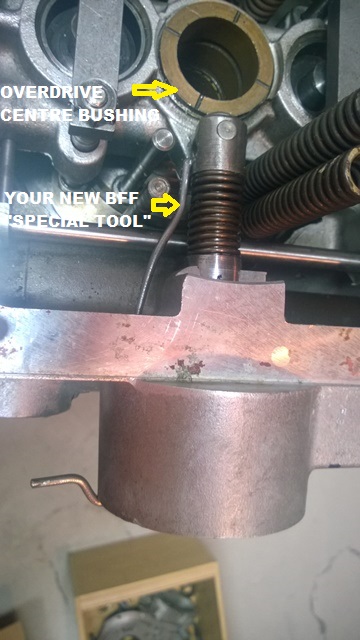
When the pump plunger is pushed down against its spring the hooked end of the “Special Tool” engages into the plunger just below the roller and holds the plunger in the down position. It is easiest to install the “Special Tool” before placing the clutch springs in position.
The shape of the little hook on the top of the “Special Tool” is very important but not difficult to form.
Now when the cam is placed in its correct position there is plenty of clearance between the lower section of the cam and the plunger roller allowing the cam, while installed on the gearbox shaft, to pass into position against the overdrive centre bushing without contacting the pump roller.

Now the installation procedure is much easier.
Use a little heavy grease to hold the pump cam in place on the gearbox shaft with the high part of the cam uppermost.
Position the overdrive unit with the drive shaft flange on the ground.

Use a dummy shaft to check the alignment of the internal splines and then ensure that all the clutch springs are correctly installed (short ones innermost).
Put the gearbox into 1st gear then carefully lower the gearbox down onto the overdrive unit. You may have to turn the gearbox input shaft to align the splines inside the overdrive. When the gap is down to about 1/2″ peer in using a flashlight to ensure that the clutch springs are all correctly positioned at the top.
The gearbox and overdrive should pull together easily.
Don’t forget to extract and save your “Special Tool”.
It’s the small things that does it, will keep this in mind and make a tool next time I do this.
Michael, mate, I am currently overhauling an Austin Healey gearbox and just happened to open your blog.
All I can say is, I fully appreciate your little tool, excuse the pun.
This is the smartest thing to get around the hassle of joining the overdrive to the gearbox.
Many thanks, I will pass it onto my other Healey friends that struggle with this x?!!? pump.
Graeme
Simple and cheap what’s not to like😊
Hi,
in effect it is impossible to mate the overdrive correctly as describe in the factory workshop.
on my Jaguar one i do exactly the opposite way without any tool and it slip right in place effortlessly.
this my method:
– gearbox in horizontal position
– align carefully splines in overdrive.
– put the gasket on gearbox
– put the pump cam on overdrive maintain with a small amount of grease so that the splines of the cam where align exactly like the splines of the overdrive and the thinnest point of the cam are located in front of the pump plunger roller.
– slide the overdrive in place and the splines of the overdrive must engage effortlessly, and after that if the cam doesn’t engage effortlessly too (stop at about 15mm of the flange), with first gear engage, rotate a little in opposite direction (play with it) with hands the input shaft (clutch plate shaft) and drive shaft flange of the overdrive, so it must slip right in and contact the gearbox flange effortlessly.
– to ensure the pump work, remove the pump spring and ball, slide in the hole a small screwdriver or wire, rotate the shaft and it must be move up and down as the cam rotate of an amount of about 4 mm stroke.
never force because if the pump plunger come in contact with the cam and don’t slip on effortlessly, if it is forced, it it will be bent and even a small amount of bent could cause it to stay blocked in full compress position after revolution of the cam and the pump will be out of service, no oil pressure any more.
hope this help.
Hi,
I´m not sure if the volvo variant is the same, but how do you align the different splines? I´ve tried but they don´t move – where there´s a “valley” on one, there´s a “mountain” on the other!
You will find that the lower spline, can be moved in one direction only.
Have you ever considered creating an e-book or guest
authoring on other blogs? I have a blog based upon on the same subjects you discuss and would
really like to have you share some stories/information. I know my readers
would value your work. If you are even remotely interested, feel free to send me an email.
We install several o/drives in the course of a year and have often used the method described here although we use a pice of black wire threaded through below the roller on the pump, and passed back through the hole in the base. We have found it much easier to attach the adapter plate to the o/drive unit before offering it up to the gearbox, that way the springs are all compressed. We have also found it to be helpful to chamfer the edge of the cam and the roller on the pump to assist in assembly.
I have always done this ‘the Rover way’ as shown to me during my apprenticeship many moons ago. On stripping the unit, we pulled the oil pump out first. On re-assembly, we put the pump in last. Very easy with the special tools tools, which I copied from the Rover tools and have used for the last 50 years.
Currently doing one for a BJ8.